| Resolve S.M.A.R.T. Status Bad Backup and Replace Error | 您所在的位置:网站首页 › smart self test华硕 › Resolve S.M.A.R.T. Status Bad Backup and Replace Error |
Resolve S.M.A.R.T. Status Bad Backup and Replace Error
How to Resolve S.M.A.R.T. Status BAD Backup and Replace Error
 David Darlington
Jun 29, 2023 • Filed to: Windows Computer Solutions • Proven solutions Part 1. What Is Smart Error? Part 2. How to Disable SMART Error Screen? Part 3. How to Backup After SMART Status BAD? Part 4. How to Recover Data if SMART Error is Received Part 5. The attributes of SMART Part 1. What Is Smart Error?Self-monitoring, analysis, and reporting technology is abbreviated as S.M.A.R.T or SMART. It is a mechanism that has been integrated into the computer hard drives, including HDDs and SSDs. It can be used to monitor the hard drive health, detect and report imminent hard drive failure, and minimize the risk of unexpected system shutdown and data loss. If you receive the error message of "Pri Master Hard Disk: S.M.A.R.T Status BAD, Backup and Replace Press F1 to Resume" when switching on your computer, it indicates that something wrong with the hard drive happens. The SMART status bad is a hard drive error, which means that the hard drive is about to crash. The reliability of the hard disk drives, as well as solid-state drives, depends upon this mechanism. If the SMART error occurs, the main reason is that the magnets inside the hard drive are now of no use. The users should ensure that the necessary precautionary measures are taken to save the data that has been written onto the hard drive. SMART technology is a mechanism that should be taken seriously, and therefore, it should never be turned off. At times the users disable it from inside the BIOS, but it is not at all recommended.
Usually, after the SMART status bad warning, you will not get a failed hard drive immediately and still have time to back up the computer and transfer data to a replaced one. However, the next question might be how to fix the SMART error. 3 ways for different situations can be considered. Disable S.M.A.R.T error from the BIOS. It is OK if you want to continue the use of the hard drive. But it is not recommended since the hard drive is doomed to failure, and disabling the error will increase the likelihood of data loss. Back up and replace. If the computer is successfully booted after pressing F1, you can immediately resort to a hard drive backup utility to help you back up important data and move them into another secure hard disk. Reboot and recover. If your computer fails to boot or data gets damaged after pressing F1 to resume, you might need bootable media and a data recovery tool to facilitate the data retrieval.
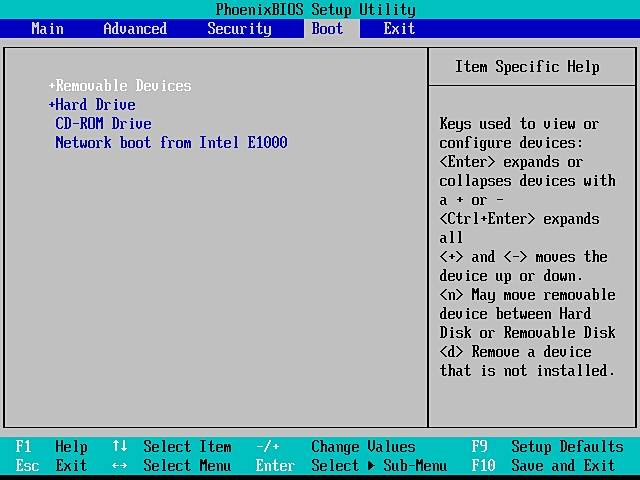
Further Read:How to Backup and Restore Data in Windows 8Top 10 Hard Drive Recovery Software for Windows and MacFree Hard Drive Recovery: How to Recover Files from Hard Drives Part 2. How to Disable SMART Error Screen?The SMART is also known as a SMART SELF TEST. It can be disabled from within the BIOS very easily. All the system manufacturers of the world strongly disagree that the error should be disabled. However, if the user is not serious about the data that has been stored, it can be disabled. This part of the tutorial is the one that can be used to disable the error. The requirements that are to be fulfilled are also mentioned. SMART error is a problem that can be faced while using any kind of drive, i.e., internal as well as external. It is, therefore, not associated with any specific kind of drive. Another kind of drive that encounters the error is Solid State Drives or SSD. Requirements PC Internet connection in some cases A hard drive that encounters the errorStep 1. The user needs to reboot the system. Once it has been done, the volume down button or the F2 is to be pressed:
Step 2. The path that is then to be followed is advanced > SMART settings > SMART self-test> Disabled. The setting is, however, enabled by default. The process here ends in full:
When encountering a SMART hard drive error, you have better back up all data present in the hard disk and contact its manufacturer to replace it with a new one ASAP. A hard drive data backup utility is your reliable assistant to help you save important data effortlessly and efficiently. AOMEI Backupper Professional could be a nice choice for you. It allows you to back up files, pictures, and videos from hard drives, computer systems, partitions, and external storage devices. You can also restore and clone everything you want. The Best Data Backup Software for Windows It allows you to take automatic, full, incremental, and differential backups of system, disk, partition, and files.
Supports system restore, disk restore, dissimilar hardware restore, partition restore, and selective file restore.
Supports disk clone, partition/volume clone, flexible clone, system clone, and command line clone.
Supports Windows 10, Windows 8.1/8, Windows 7, Vista, and XP (all editions, 32/64-bit)
Download Now Windows VersionBuy Now
It allows you to take automatic, full, incremental, and differential backups of system, disk, partition, and files.
Supports system restore, disk restore, dissimilar hardware restore, partition restore, and selective file restore.
Supports disk clone, partition/volume clone, flexible clone, system clone, and command line clone.
Supports Windows 10, Windows 8.1/8, Windows 7, Vista, and XP (all editions, 32/64-bit)
Download Now Windows VersionBuy Now
Facing "S.M.A.R.T Status BAD, Backup and Replace," backup all data on the hard drive that will fail sooner or later. Now, follow the step-by-step guide to back up the computer and repair the SMART, hard disk error. Step 1. Download and run Download and install AOMEI Backupper Professional to be ready for backup after the S.M.A.R.T error. Launch it and choose "Backup" on the home screen. Download Now Windows VersionBuy Now
Step 2. Select Disk Backup Then it would help if you chose a backup mode to continue. The backup application allows you to make backups of hard disks, systems, partitions, and files as per your own needs. And here, we will select "Disk Backup" as a demonstration. 
Step 3. Add a disk to backup Click "Select the disks you need to backup," and a pop-up window can be seen. Select the hard drive that will fail and click "Add" to go on. You are also allowed to add more disks or delete the selected disk. 
Step 4. Choose the backup location Next, click "Step 2" to choose the target drive for backed-up data. You can back them up to a different computer hard drive, but it would be better if you copy them to an external hard drive or NAS drive. 
Step 5. Get backup started Finally, click "Start Backup" to begin the process. By the way, you can make some backup settings, comment on the task, or edit the task name as you like before the click.  Part 4. Rescue Data When SMART Error Happens, and Computer Fails to Boot?
If SMART status bad is received, it is advised that all the users back up the data immediately. SMART error, in simple words, means that the hard disk can crash at any time. If the computer fails to boot for the error, probably the OS file was corrupted due to bad sectors. However, there still is a way to rescue your data from the hard disk. With Recoverit Data Recovery software, you can enter WINPE mode to recover data from the corrupted hard drive with ease. The process that a user needs to follow in this regard has been mentioned as under:  Your Safe & Reliable Computer Data Recovery Software
Recover lost or deleted files, photos, audio, music, emails from any storage device effectively, safely, and completely.
Supports data recovery from recycle bin, hard drive, memory card, flash drive, digital camera, and camcorders.
Supports to recover data for sudden deletion, formatting, hard drive corruption, virus attack, system crash under different situations.
Free DownloadFree Download
Your Safe & Reliable Computer Data Recovery Software
Recover lost or deleted files, photos, audio, music, emails from any storage device effectively, safely, and completely.
Supports data recovery from recycle bin, hard drive, memory card, flash drive, digital camera, and camcorders.
Supports to recover data for sudden deletion, formatting, hard drive corruption, virus attack, system crash under different situations.
Free DownloadFree Download
and follow the next simple steps to retrieve lost, deleted, or damaged data from your computer. Step 1 Download and install the program on a normal computer. Step 2 Select the "Recover from Crash Computer" option and click the Start button. Then follow the instructions to create bootable media (prepare a USB flash drive in advance).
Step 3 Plug in the bootable media to the computer unable to boot and set the computer to boot from the USB drive.
Step 4 Once booting from the USB drive successfully, the Recoverit program will launch automatically. It provides two modes for you to recover data - Hard Disk Copy mode and Data Recovery mode. Please choose one of them to recover your data from the crashed computer. For more detailed steps, check the Recoverit guide. Note: Once the SMART error is received, then it means that the hard drive can crash anytime. The crashed hard drive, therefore, was never detected by any software. On the other hand, the user needs to retrieve each piece of info from the infected drive. The Recoverit Data Recovery is therefore mentioned for all the users who wish to retrieve the data in full. Once the recover button is pressed, then the user can specify the location that can be used to save the recovered files. Pressing F1, the computer cannot boot. Your files might get damaged or corrupted. Get them back with Recoverit Data Recovery. Part 5. The attributes of SMARTEach hard drive manufacturer ensures that a threshold value is set for a certain operation's hard drive. Under normal circumstances, the threshold value should never exceed. If it is done, then the error is faced. There are a total of 256 values that are also associated with the HEX ID as well. Some of the errors and the threshold values are critical. The total number of errors that are considered to be critical is 11. The SMART error is one of them and, therefore, should be taken very seriously. There is no solution to the issue. The user needs to change the hard drive and make the backup as soon as the error is seen for the first time. For complete information and more study on the topic, the user can visit the URL https://en.wikipedia.org/wiki/S.M.A.R.T.#ATA_S.M.A.R.T._attributes. The SMART error is critical, and there is no process at all that can correct it. If the error is encountered, it is never advised to disable it at all. SMART error screen always appears if the hard drive is not changed. The necessary steps are the backup as well as the data retrieval from the old sectors. Therefore, the user should choose AOMEI Backupper Professional or the Recoverit Data Recovery program to get awesome results. This program leads the users to the best results. Once the SMART error executes itself completely, no program could detect the hard drive. The necessary steps should, therefore, be taken first hand. Free Download | Win Windows Version Free Download | Mac Mac Version Computer Data Recovery Windows PE Repair Windows 10 Create USB Boot Disk Fix Missing Operation System Create USB Boot Disk System problems Reset Windows 10 Install Windows 10 on SSD Can't Enter Safe Mode Fix no Sound issue Parameter is Incorrect PC Errors Fix can’t Enter BIOS Not a Valid Win32 Application Error CD-ROM /DVD not working Delete Memory Dumps Connect an External Monitor Shift Key Not Working |


【本文地址】